Background:
I spent this past summer working at Cadence Design Systems, Inc., an EDA company headquartered in San Jose, California. During the course of my internship, I worked on Allegro, Cadence's proprietary printed circuit board (PCB) design tool. More specifically, I worked on Allegro's 3D Canvas, a recently overhauled project that aims to render PCB data in 3D, allowing for powerful, flexible, and intuitive PCB design in 3D space. I actually worked at Cadence the previous summer as well on the same tool, and since then, 3D Canvas has undergone systemic top to bottom upgrades, aiming to flesh out the tool with a huge focus on uncompromised performance. To that end, a lot of my time this summer was focused on implementing features to augment the performance of the 3D rendering engine being used, as well as implementing higher level features aimed at making the newest rendition of 3D Canvas easy and familiar to navigate.
Reverse Depth Buffer:
Let's talk about Z-fighting. Despite its relatively cool name, Z-fighting is actually a super annoying phenomenon that occurs due to imprecision in the depth computation during rasterization. There's a really well written explanation of this issue by Nathan Reed at Nvidia that explains the math behind it, but in short, the depth projection we use in perspective projection transformations is nonlinear. If this wasn't bad enough, hardware floating point precision is nonlinear too! Remember, in our perspective transform, we'll project depth coordinates to be in the [0, 1] range, so if the precision of floating point numbers is inherently nonlinear, and we combine this with the fact that the depth map between world space coordinates and clip space coordinates is nonlinear, we end up with a super skewed distribution of distinguishable discrete representable depths.
In practice this results in fragment bleed and flickering, a phenomenon that Reed refers to as "indistinguishability". Imagine 2 planes, plane A and plane B. Plane A has a depth of 0.00001 in world space units, and plane B has a depth of 0.0001 in world space units. We immediately know that plane A *should* appear above plane B, but due to the imprecision in depth computation, it may very well be that plane A and plane B get projected to the same depth in [0, 1] coordinates. If this happens, some of the fragments of plane A and some of the fragments of plane B will bleed into each other, which causes the planes to flicker and swap as the depths conflict.
We can alleviate a lot of Z-plane fighting by implementing the reverse depth buffer. The reverse depth buffer maps depths from [1, 0] instead of [0, 1]; this means nearer depths will now be mapped to 1 instead of 0. Of course at face value this wouldn't do anything to help with depth imprecision, but the key is, by reversing the direction of depth projection, we can, in effect use the nonlinearity in the depth projection computation to cancel out part of the nonlinearity in the floating point depth mapping precision. I'm eschewing some of the annoying mathematical details in favor of a more intuitive explanation, but check out Reed's post for a more rigorous walkthrough and some nice diagrams that explain the phenomenon well. It turns out that this simple trick is actually super effective. I also switched over to using a 32 bit floating point depth buffer, instead of a 24 bit floating point depth buffer to further augment the precision increase.
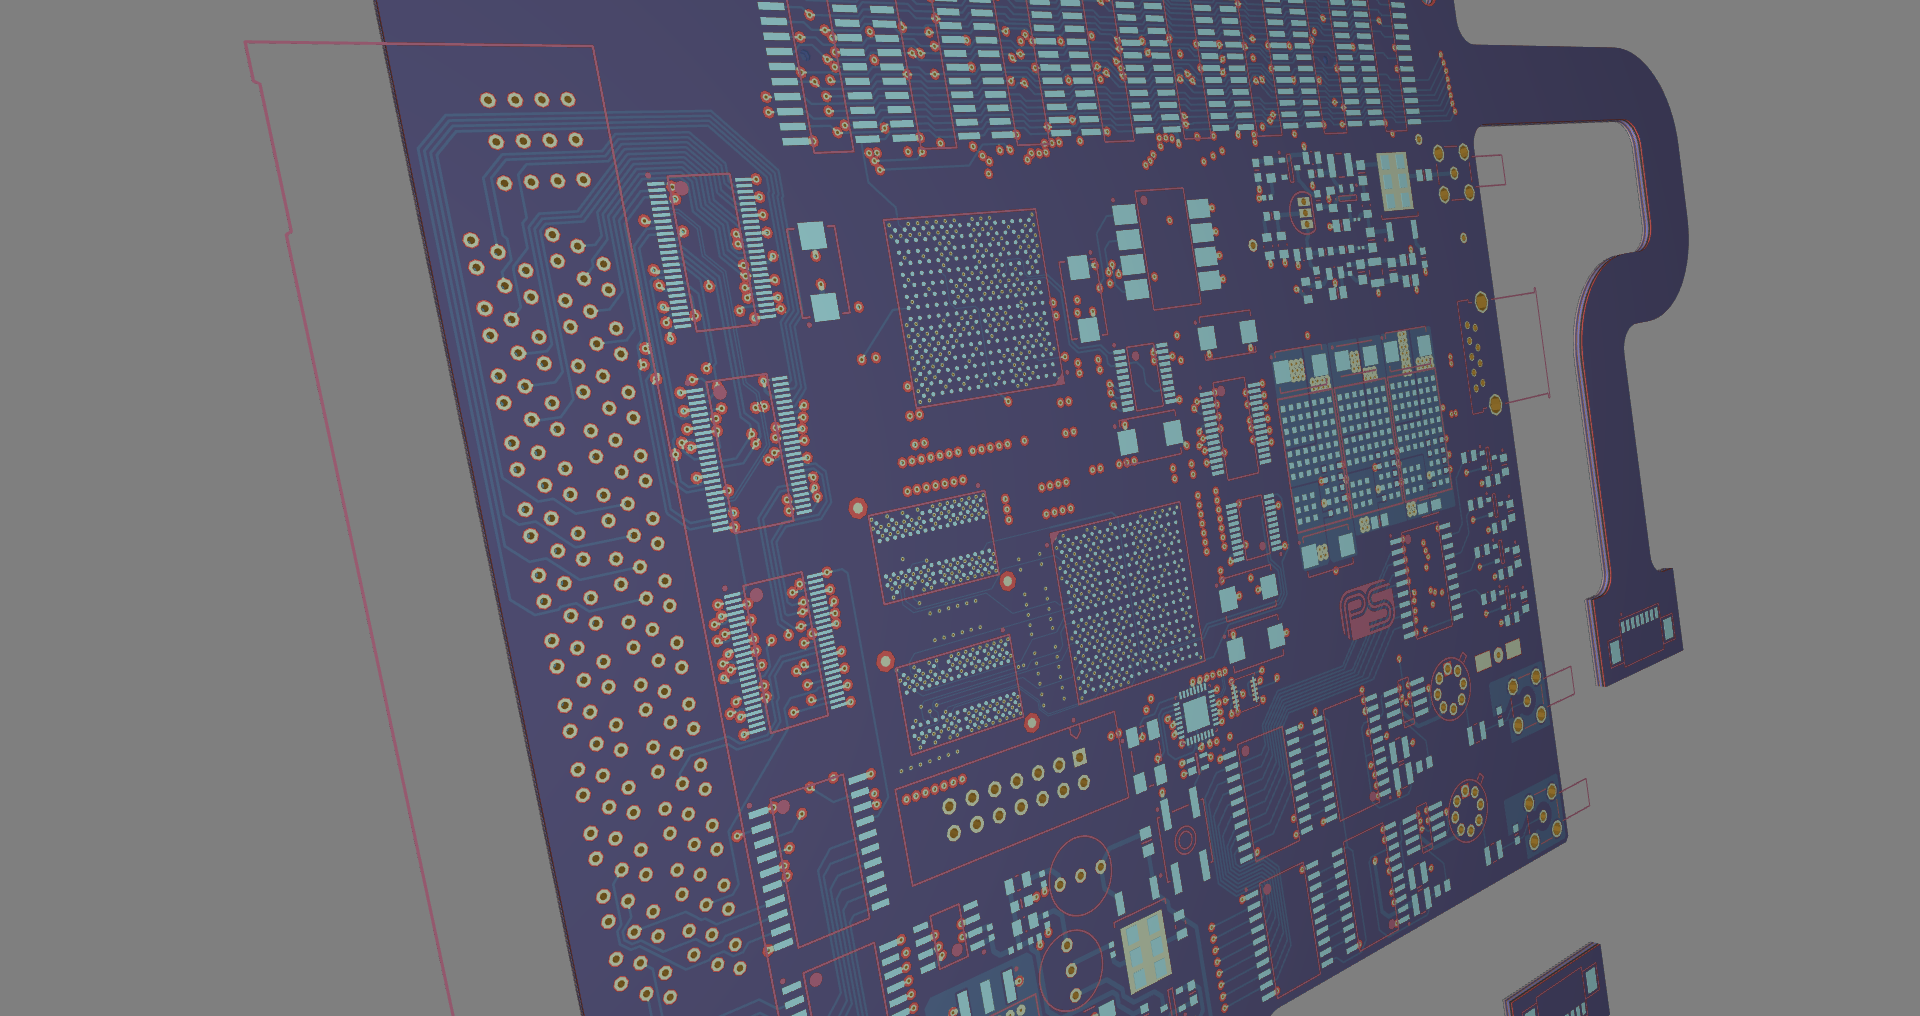
At Cadence, Allegro's 3D Canvas has to deal with loading PCB data, which by nature suffers quite a bit from Z-fighting. Board layers and components can be separated on the order of microns, which is pretty extreme considering most games (where we see Z-Plane fighting commonly) don't operate on nearly this level of precision. In practice, this means that PCB data flickers, a lot, which can be super distracting for designers. We integrated support into a 3D rendering engine for this high precision reversed depth buffer (invokable through the normal rendering commands) in hopes of fixing the Z-Plane fighting issue, and it worked! We can get significantly better depth distinguishability, which means designers can zoom out and view the board as a whole without worrying about fragment bleeding. This also inadvertently deals with selection issues. If we're selecting a pixel on screen, and we mean to select a scene element but a lower scene element bleeds into it, we might accidentally select the wrong object, which can be super frustrating.

Look how far we can zoom out! The board will disappear due to far plane clipping before we see Z-fighting.
Pixel Buffer Objects, Asynchronous Transfer, and DMA:
Since we're in the business of designing EDA tools, one of the most important things a board designer will need to do is to select a component. Given that's the case, selection needs to be fast. In our current implementation, we can render object IDs to a texture, and when we need the IDs, we'll pull the texture from the GPU to the CPU then query our texture to see what the ID of the selected scene element was. It's a pretty simple and intuitive implementation that was put together for testing purposes and worked really well for the time being to test our infrastructure. Speed wise, this entire selection operation takes ~15ms which actually seems decent. For most applications, 15 milliseconds is basically inconsequential, but in graphics applications, 15 milliseconds is a pretty significant amount of time. Let's put this in perspective. For a 3D application, let's say we're running on a 60hz panel (standard framerate). This means we have 60 frames per second, or just under 17ms to render each frame. Uh oh. Of our 17ms to render a frame, we're using 15ms just to do the selection operation. 15ms just went from not bad to ~90% of our render budget, which is, of course, terrible.
The core issue is we're introducing a stall of sorts on our CPU with this sort of lazy evaluation. When we pull the texture information from the GPU to the CPU, we block the CPU from doing *anything* until the transfer is complete. This means relevant selection information usually is kept on the GPU until it's needed, and consequently, it usually isn't on the CPU when it's called on. This is when we have to wait for the transfer, and this is what's causing some performance issues. The key insight is, we really don't need to wait for the pick data to be called on before transferring it, and here is where the idea of pixel buffer objects, or PBOs comes into play.
We can render selection data to PBOs, and as soon as the data is done rendering, we'll start the transfer to the CPU, rather than waiting for a pick operation to trigger this transfer. This seems nice, until we realize, won't this still stall the CPU since the CPU will have to wait for the GPU transfer to complete? In fact, we can rely on OpenGL drivers to load the selection data from PBOs directly to memory, without stalling the CPU using direct memory access, or DMA.
Using these OpenGL drivers and PBOs, we can leverage asynchronous transfer to get GPU data to the CPU, without requiring the CPU do all the transfer work, blocking it from executing further instructions in the renderpath. In practice, we'll need 2 PBOs, since we technically aren't using selection data from the current frame. The transfer isn't a fast operation by any means, and relying on drivers and DMA alone won't speed up our transfer measurably. The time needed for a transfer doesn't go away, remember, the key benefit of asynchronous transfer is that the OpenGL drivers can schedule the transfer at their convenience, rather than imposing a CPU stall. This means the selection data for the current frame won't be ready since we need to render it and transfer it before it can be used. This is why we have the second PBO. In reality, we'll transfer the current frame's selection data, then process the previous frame's selection data which due to DMA should already be in memory, making it a fast operation! This is where the performance boost becomes relevant. Since we're always using preloaded selection data from the previous frame, we aren't wasting time waiting for selection data from the current frame. Of course this begs the question, is it valid to use the pick data of an expired frame? Realistically speaking since the frames are separated by 17ms assuming a 60hz display, the only way to invalidate the pick data would be to alter the view so drastically in 17ms as to render the pick data incorrect. Fortunately, this isn't a realistic feat for humans, and thus not really a concern for our use case.
Arcball Cameras:
These past two projects are geared towards improving the user experience in a way that will be invisible to them. Basically they ensure the application functions seamlessly without causing annoying performance issues that would impact user experience. On the other hand, this next project is much more high level, and focuses fundamentally on how the user will interact with the software. Intuitive navigation is probably the first thing users of CAD programs and 3D Modelling platforms notice. Our current program uses a fly camera, a free floating orientation-independent camera that supports unencumbered movement, "flying", throughout the scene. This is a nice initial camera model since it's simple to use, simple to implement, and great for testing. Unfortunately, it isn't really great for board designers. It suffers from disorientation since there is no scene origin and no sense of well defined axes, which can make scene navigation awkward and difficult to control.
Arcball cameras on the other hand are focused on clean navigation. They impose an implicit scene focus thus allowing all viewport transformations to be performed in relation to the view origin. This lends a sense of orientation and fundamentally improves the navigation experience. The arcball camera now supports view dependent panning and zooming, easy free rotation, and manual focus setting with raycasting. It's a method of camera controls that are used heavily in tools like FreeCAD, Blender, Maya etc.
 | 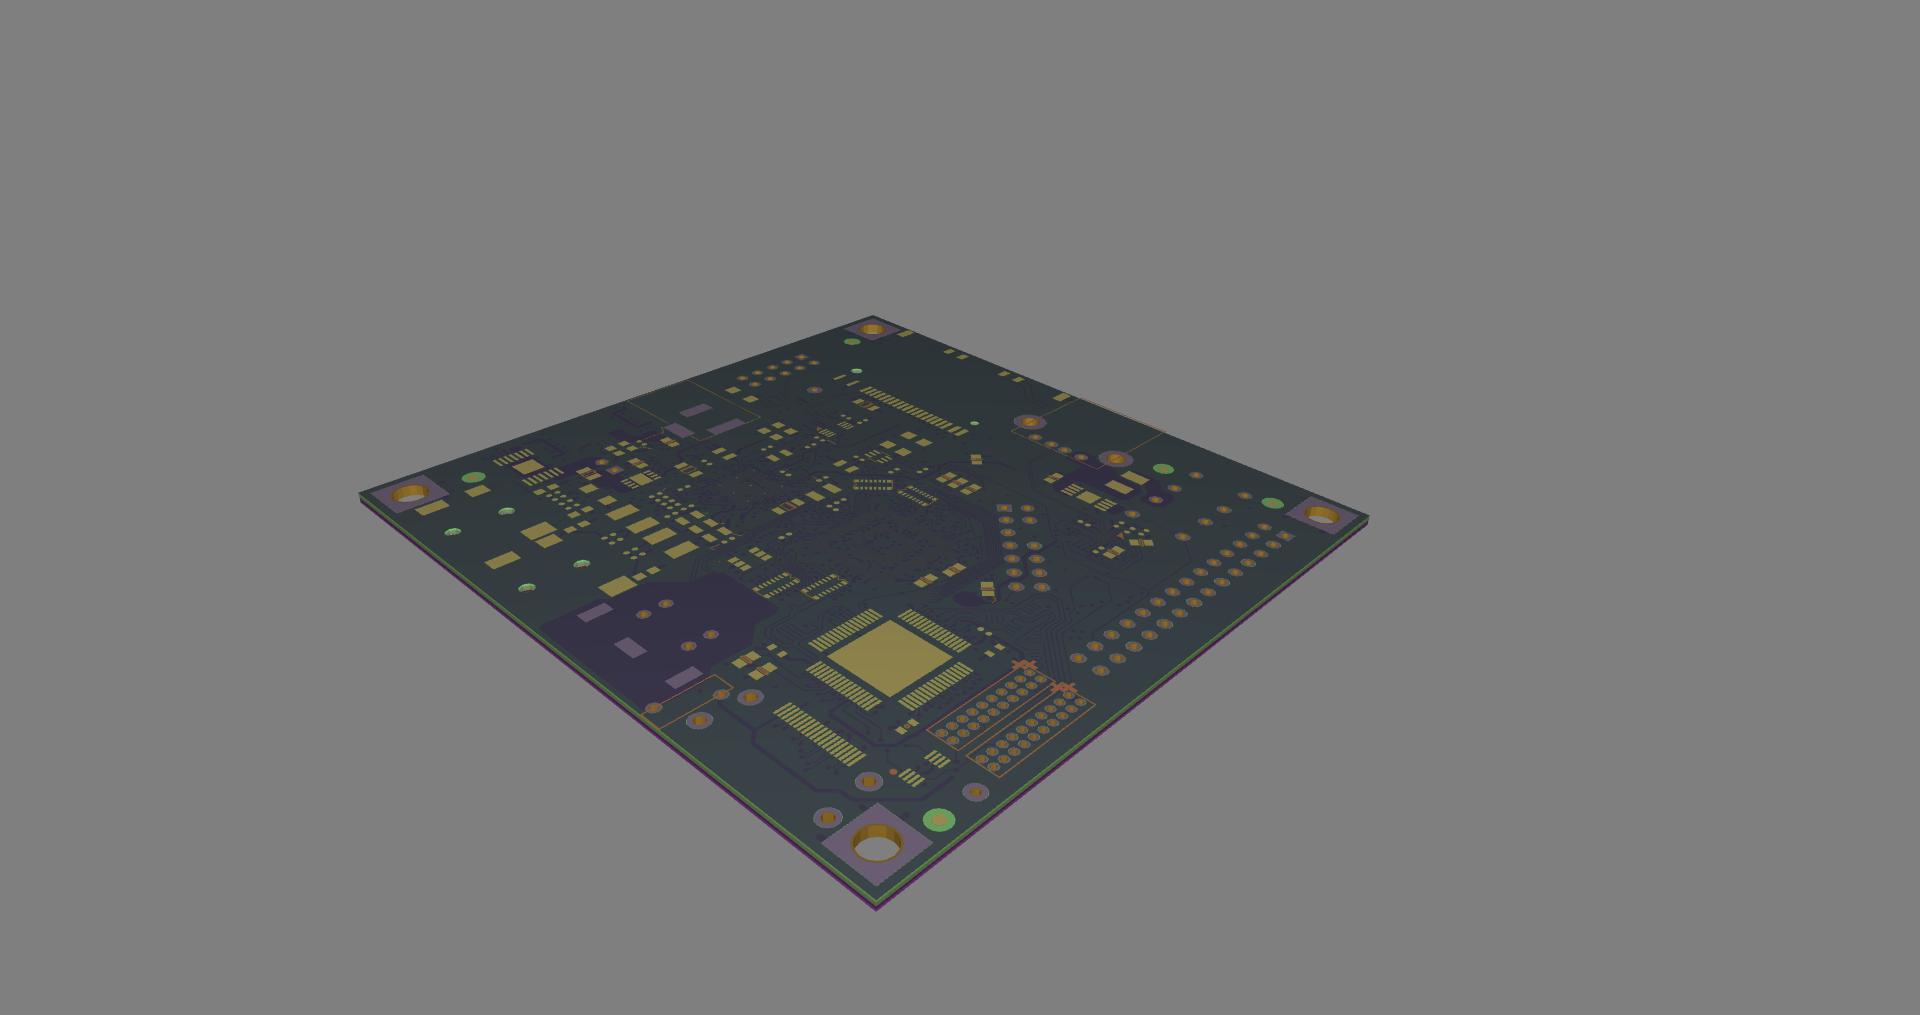 |
With the arcball camera, it is very easy to get perspectives like the isometric board view on the right.